InstallGuru Documentation
by Aswath Ayyala (install_guru@yahoo.com)
Introduction
The InstallGuru is a program written in Java for creating installers for Java and non-Java applications. Since this install application is written in Java, it can run on any operating system where there is a JRE. InstallGuru also includes some custom features for Windows platform like creating shortcuts, querying registry, storing into registry etc.
InstallGuru comes with lots of predefined GUI panels and tasks, which are enough for most common installers. Java programmers can take full advantage of InstallGuru by creating custom GUI panels and tasks. InstallGuru also uses Ant tool for packaging the installer. This product includes software developed by the Apache Software Foundation (http://www.apache.org/).
I would like to hear comments and suggestions from you and based on the requests I would like to add more features and tasks to this installer. Please email me when you find any bugs or if you need any help. I will try to respond ASAP.
Creating Installer
Run the InstallGuru Install Maker tool to create or edit an installer
created by InstallGuru.
Enter the required information in the General tab as shown in the following
picture.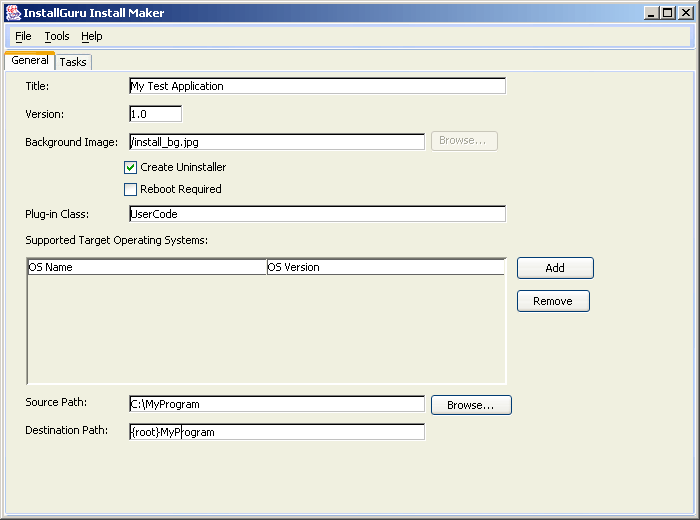 .
.
And add the install tasks to be performed by the installer
and set the appropriate properties in the Tasks tab as shown in the following
picture.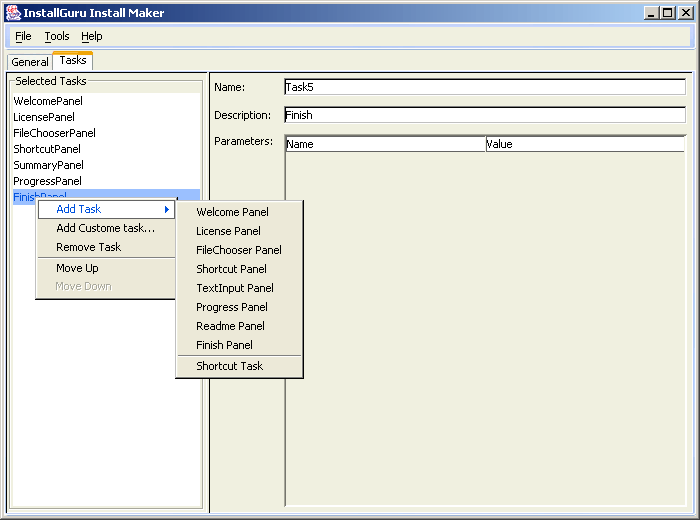
To save the project select File->Save Project menu.
Then install maker will copy necessary files needed to create the installer along with the ant script in build.xml to your project directory.
Copy the necessary files like license.txt, readme.txt and also copy jar files and class files which are required at runtime for your plug-in class or for your custom tasks. You can do these previously mentioned steps by editing the ant script if you are familiar with ant script.
To create final installer for distribution, you need to run the ant script from build.xml, which creates the installer ready for distribution. To run the ant script, do the following
In Windows:
Run <project directory>\build.bat
In Linux or UNIX like environments:
Run <project directory>/build.sh in the command line shell
When you run the ant script Install Maker creates Install.class in Installer directory which can be distributed and can be run on any platform where there is JVM. It also creates another installer with JRE as installer.zip in InstallerWithJRE, which includes the JRE.
Make sure you run and test the created installer in the target environment at least once before you ship it.
To run the created installer, change to the Installer directory and run <java home>\bin\java Install (in UNIX environment <java home>/bin/java Install).
Configuring Installer
InstallGuru can be configured through install.xml file that tells the installer, what GUI panels to show, and what tasks to do and the order in which they are executed. Following is the list of predefined GUI panels.
· WelcomePanel
· LicensePanel
· FileChooserPanel
· ShortcutPanel
· TextInputPanel
· SummaryPanel
· ProgressPanel
· ReadmePanel
· Finishpanel
WelcomePanel
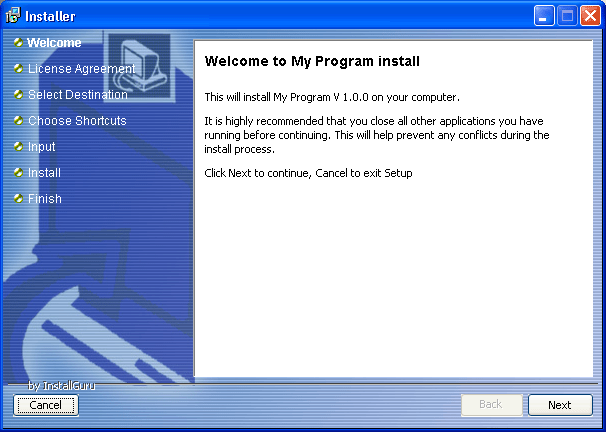
This shows welcome screen. It inserts the title and version information given
in the install.xml at appropriate places.
LicensePanel
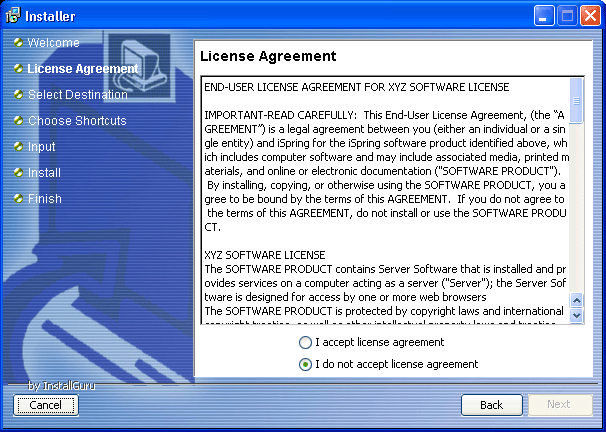
This screen shows the license agreement. By default it looks for the license.txt
file in the classpath. You can also specify another file in the install.xml by
passing LicenseFile parameter to the task. The file also can be an html file.
For example: <parameter name="LicenseFile"
value="/license.html"/>
FileChooserPanel
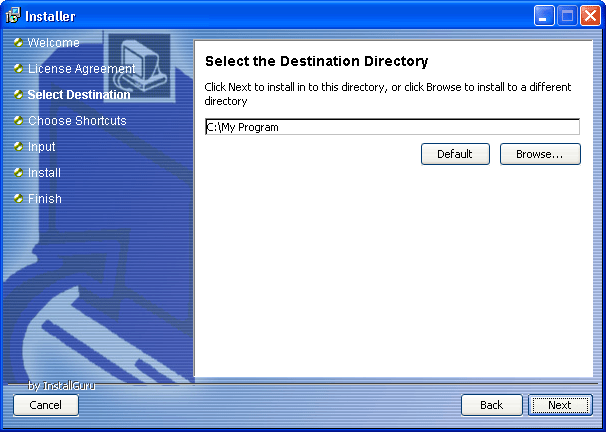
This screen lets user to select install location. It shows the destination-dir
tag value in the text field. This value can also be accessed from the
{destination-dir} property from the code.
ShortcutPanel
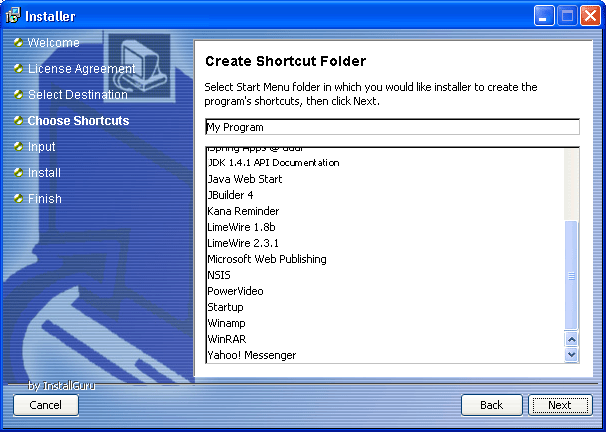
This screen lets user to select shortcut folder under start programs menu in windows.
It shows the shortcut-dir tag value in the text field. This value can also be accessed
from the {shortcut-dir} property from the code.
TextInputPanel
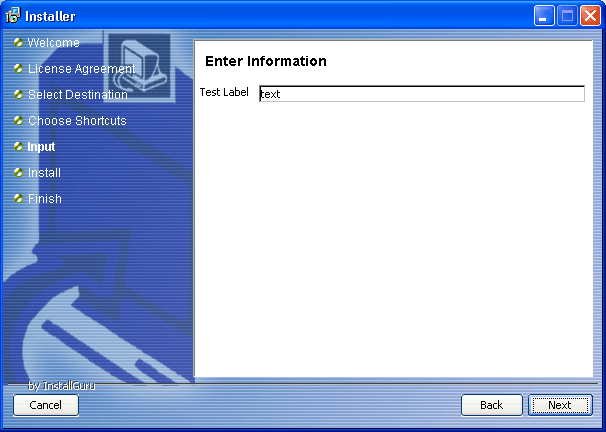
This screen lets you take input from the user. The input fields should be added
with the API call, not from the install.xml. So, you have to code in plug-in class,
which is explained later in the document. Also see the sample plug-in class
provided with installer.
SummaryPanel
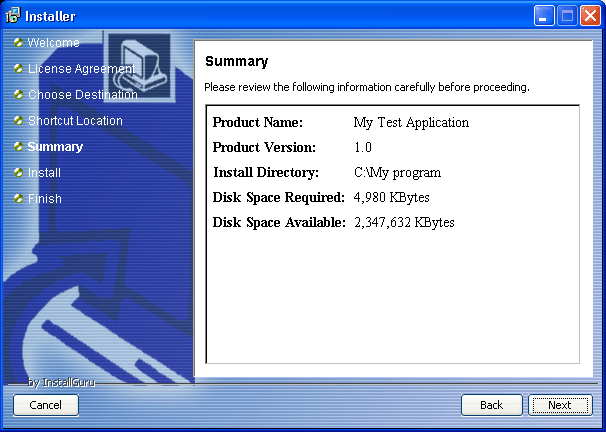
This screen shows the summary of the install process.
ProgressPanel
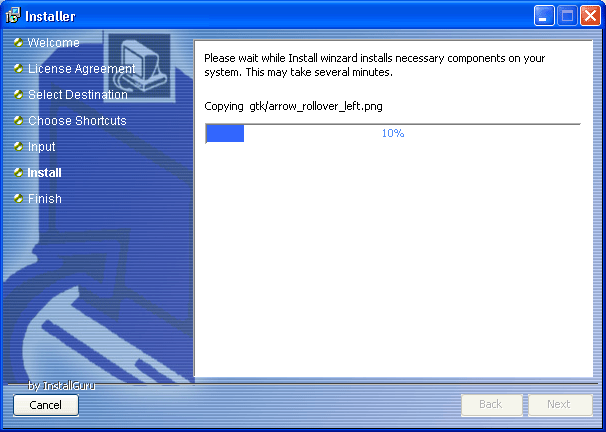
This screen shows the progress of the install/uninstall process. By default it
extracts the data.zip file from the installer directory to the destination directory.
If you want to extract a file with another name, then you have to add a
property named {installResources} containing the name of your file.
ReadmePanel
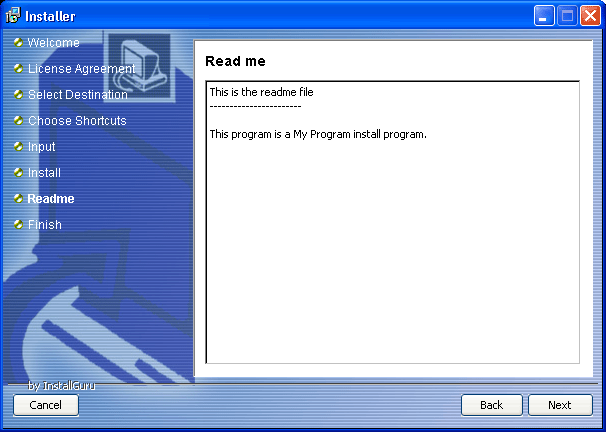
This screen shows the readme file. By default it looks for the readme.txt file
in the classpath. You can also specify another file in the install.xml by
passing ReadmeFile parameter to the task. The file also can be an html file. For
example: <parameter name="ReadmeFile"
value="myreadme.html"/>
FinishPanel
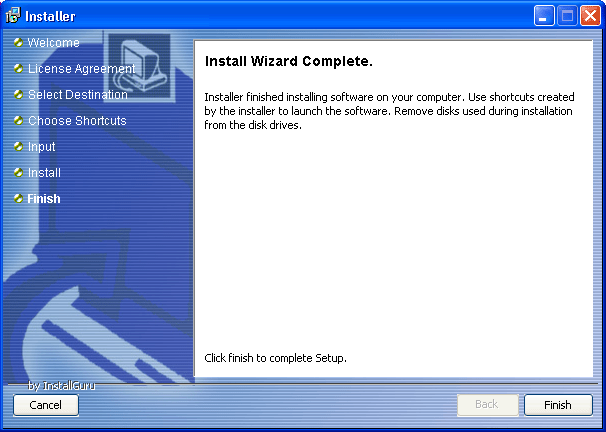
This screen tells the user that installation is done. This would be last task
in the install.xml. When the user clicks finish installer performs any clean up
things need to done.
And there is one non-gui task
· ShortcutTask
which creates the shortcut in specified location. Right now, this task only
works on Windows. This task will be ignored on other operating systems.
Creating Custom Task/Panel
You can create a custom task by implementing the interface InstallTask or create custom panel by extending the InstallTaskPanel. It has 4 methods. They are:
public boolean isOSSupported();
This method is called by the installer to check whether this task is supported
by the OS where the installer is running. You can have some tasks, which are
supported by some Operating Systems and not by the others. For example: ShortcutTask
and ShortcutPanel are supported on only in Windows. You can have this task in
your installer, but it will only show up when running in Windows. It won't show
up when running under LINUX.
public void init(java.util.Properties props) throws InstallException;
This method is called by the installer when the task is initialized. This
method can be called multiple times if the user goes back in the install wizard
and come to the task again. So, make sure to have some kind of flag set in the
init method, if you don't want to init your task more than once. The argument
to this method is installer properties.
public boolean doNext(java.util.Properties props) throws InstallException;
This method is called when the task is executed and before moving to the next
task. GUI panels, should return true to move next, or return false to stay on
the same screen. Non-GUI tasks should always return true. In case of any fatal
exception you should throw InstallException. Then installer will abort.
public void doCancel(java.util.Properties props);
This method is called when the user clicks on the cancel button and confirms to
exit.
Writing Plug-in class
You can write custom code which can be executed during the install process using plug-in class. During the install process installer looks for certain methods in the plug-in class and calls them at appropriate times. Before and after executing init method on an install task, installer calls <taskname>_preInit and <taskname>_postInit methods respectively. Similarly, before and after executing doNext method, installer calls <taskname>_preNext and <taskname>_postNext respectively. The return type for preNext and postNext methods should be boolean. The plug-in class should be defined in install.xml and uninstall.xml under the plugin-class tag and make sure plug-in class is in the classpath of the installer when bundling the installer.
For Example: If you have task defined in install.xml with the name 'welcome' then you may have the following methods in the plugin class:
public void welcome_preInit(java.util.Properties props)
public void welcome_postInit(java.util.Properties props)
public boolean welcome_preNext(java.util.Properties props)
public boolean welcome_postNext(java.util.Properties props)
Installer Properties
Some of the installer properties available to the plugin class are:
|
{root} |
Root of the file system. For example: on Windows the value is C:\, on UNIX like OS it will be / |
|
{/} or {\\} |
Platform specific file separator. |
|
{title} |
Title of the program, also defined as constant TITLE in Installer class |
|
{version} |
Version of the program, also defined as constant VERSION in Installer class |
|
{destination-dir} |
Install directory on the target machine, also defined as constant DESTINATION_FOLDER in Installer class |